LiteSpeed Cache Plugin – Complete Setup & Optimization Guide
Do you want to run your website litening fast? LiteSpeed Cache plugin is a caching plugin that helps improve performance, increase traffic, and boost your earnings.
In this article, I will show you the easiest way to set up the LiteSpeed Cache WordPress Plugin to boost your site’s performance.
Table of Contents
what is litespeed cache plugin ?
LiteSpeed Cache plugin is a WordPress plugin that speeds up your website by caching pages, optimizing images, minifying CSS/JS/HTML, and improving database performance.
It works best on LiteSpeed servers but also supports other environments like Apache, NGINX, and OpenLiteSpeed.
Here’s what it does:
- Caches full pages to reduce server load and make your site faster.
- Optimizes images with formats like WebP and AVIF.
- Minifies and combines CSS, JavaScript, and HTML for smaller file sizes.
- Provides object caching (Redis/Memcached) for faster dynamic content
- Integrates with CDNs (like QUIC.cloud and Cloudflare) for global speed boost.
- Cleans and optimizes your database automatically.
- Supports lazy loading and responsive images.
- Offers settings to exclude specific URLs, user agents, cookies, or categories from cache
By using this LiteSpeed Cache Plugin, you can achieve faster load times, better Core Web Vitals, and improved SEO performance with a simple setup.
You can also apply prebuilt presets according to your site’s needs.
Most basic features are compatible with any server, but some advanced cache functions require LiteSpeed or a compatible hosting platform.
How To Setup Litespeed Cache WordPress Plugin ?
Setting up the Litespeed Cache plugin on a WordPress website takes a few minutes. Here are the steps you can follow to install and set up the plugin:
- Login In the WordPress dashboard, navigate to the “Plugins” menu, and click on the “Add New” button.
- In the “Add Plugins” page, type “LiteSpeed Cache” in the search bar, and click on the “Search Plugins” button.
- From the search results, select the “LiteSpeed Cache” plugin by LiteSpeed Technologies, and click on the “Install Now” button.
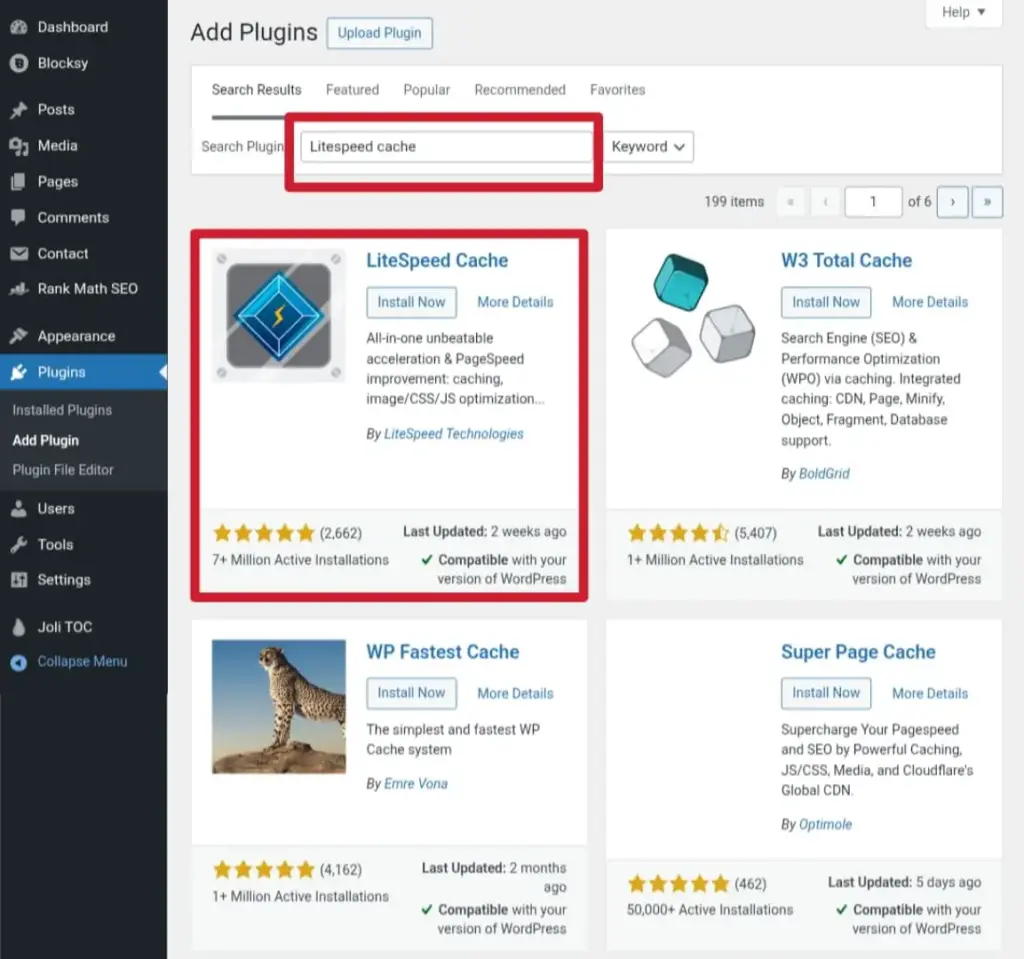
- Once the installation is complete, click on the “Activate” button to activate the plugin.
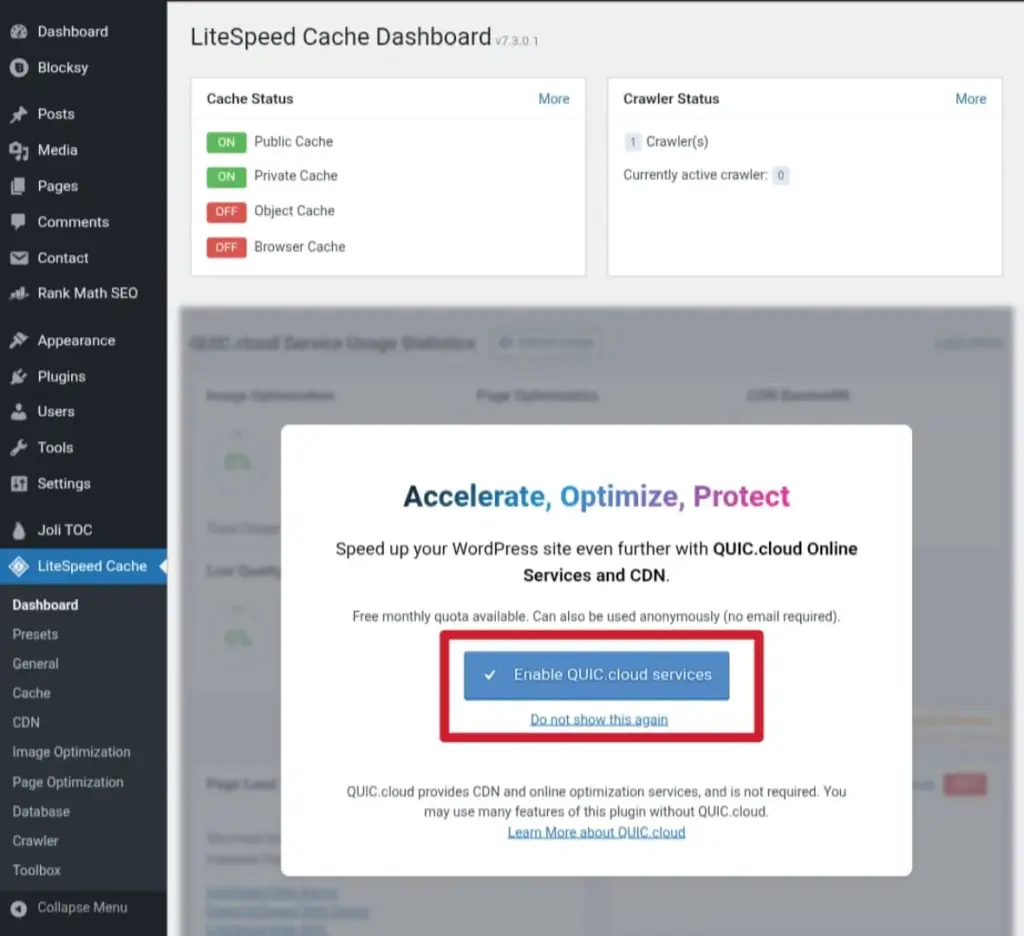
- plugin is activated, you will see a new “LiteSpeed Cache” menu item in the WordPress dashboard (see below).
- Now, click on “LiteSpeed Cache” and then the “dashboard“. You will see a pop-up to “enable quic.cloud services“, click on them.
- On the screen, you will see “Sign up” or “Create account.” Click on them to create an account using your email and password, or sign up with Google.
- After registration is completed, click on the “add site” button and add your domain
- Now you need to update your “NS record” or add “CNAME“. Go to the domain registrar where you purchased your domain and add them (You can also add a CNAME record by using Cloudflare)
- Now, click on the “verify“button. This will take a few minutes to update DNS records.
- Return to the WordPress dashboard and click the “Presets” button in the Litespeed Cache menu. You will see “Advanced (Recommended)” presets; click on “apply preset,” and you are all done.
Note :
If you want advanced customisation, then apply the settings below
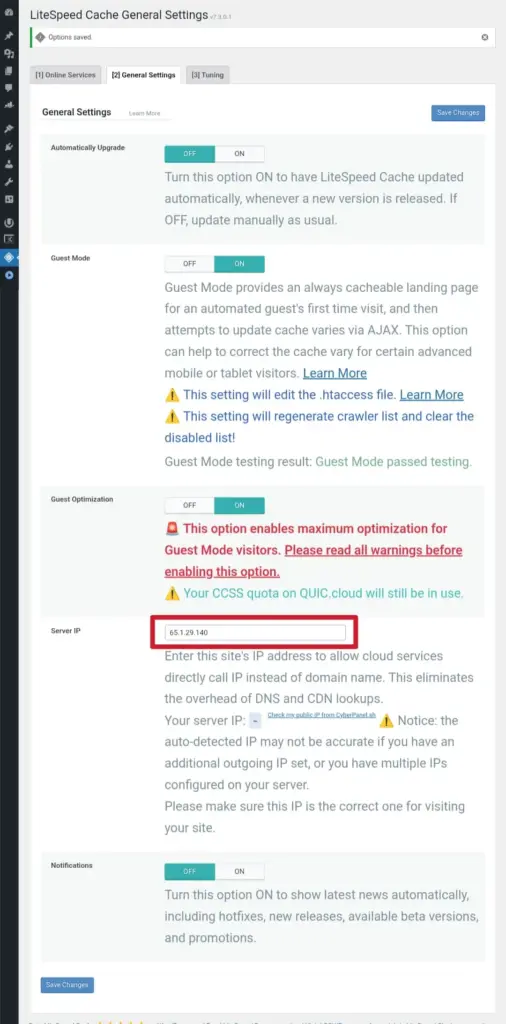
- In the Litespeed Cache menu, click on the “general” button and click on “general settings,” then enter your “server IP“, and click on the “save changes” button.
- Now in cache settings, click on the “object” button, then “Object Cache,” and set it to “ON.” Make sure the “memcached” or “redis” extension is enabled; if not, then contact your hosting provider to enable it and make sure the connection is okay and click on the “save changes” button.
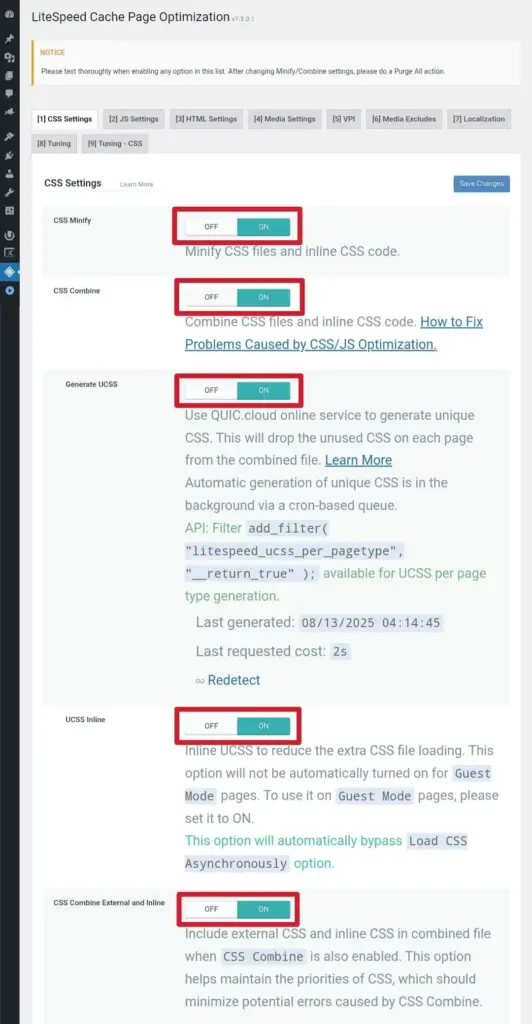
- Click on “Page Optimization” in the Litespeed Cache menu, then click on the “CSS” button. Set “CSS combine” ON, “generate UCSS” ON, “UCSS inline” ON, “CSS combine external and inline” ON, and then click on the “Save Changes” button.
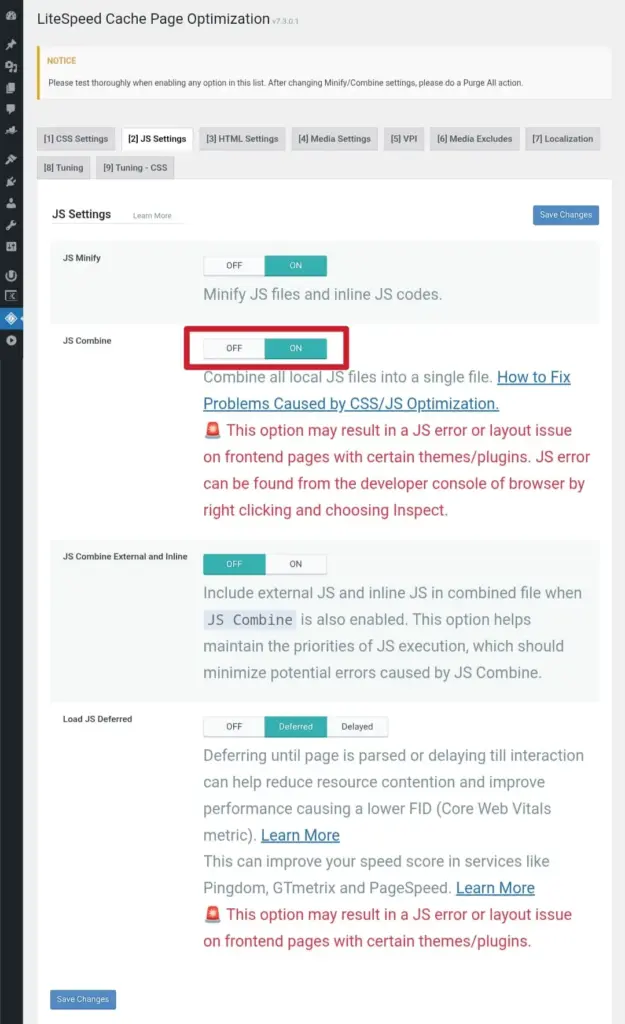
- In JS settings, set “JS combine” to ON and click on the “Save Changes” button.
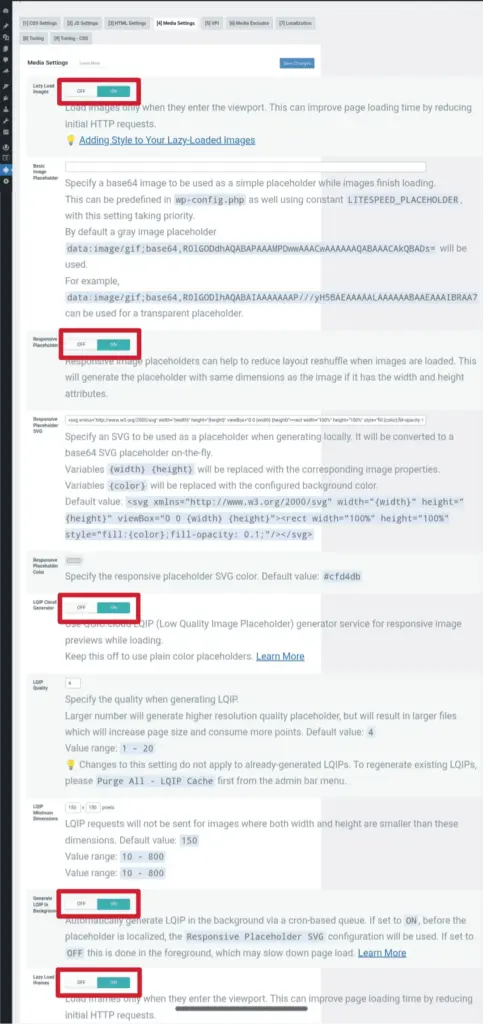
- Now click on “media settings“, “lazy load images” set ON, “Responsive placeholder” set ON, “LQIP Cloud generator” set ON, “Lazy Load Iframes” set ON, “Add Missing Sizes” set ON, and then click on the “save changes” button.
Please note that the settings may vary depending on your website. Therefore, it’s recommended to read the plugin documentation for detailed configuration and optimization options.
If you have any issues during this process, then you can ask me in the comment section.
Don’t forget to share this article with your blogging community and help them to grow their site performance and traffic.